Free sample · first 11 of 104 pages
Look Listen Play
Piano and Keyboard for Students
An illustrated beginner workbook
Find keys • Listen • Play • Practice
NISMCAA | Book 2
Your piano journey
Start by finding the keys and making a clear sound. Learn a little at a time, then play tunes and chords and share a piece with others.
Use this book with a music teacher or a helpful adult. The numbered maps show exact key locations; the illustrations show general playing situations.
My name: __________________________________
My school: __________________________________
My teacher: _________________________________
My first goal: _________________________________
How to use your book
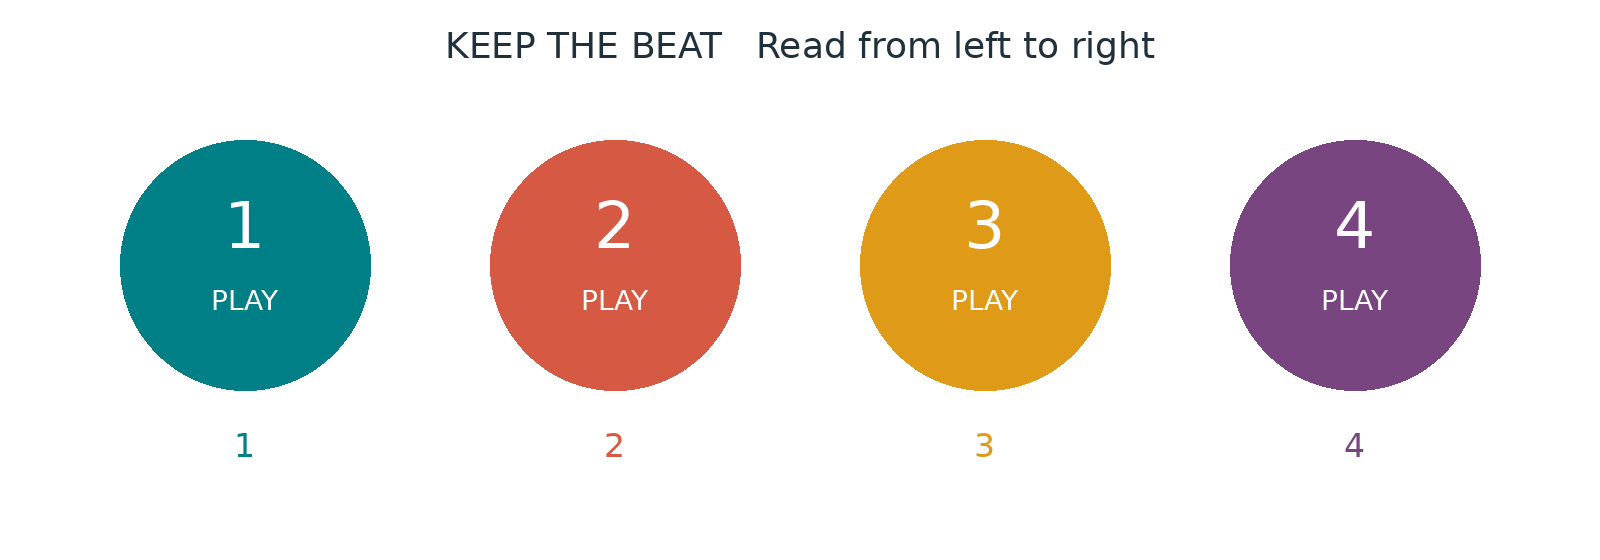
1. LOOK at the visual and find the same keys on your instrument.
2. TRY the numbered steps slowly.
3. LISTEN for the sound described.
4. PRACTICE the facing page and show your teacher.
Stop if playing hurts. Relax your hands and take breaks. A teacher can adapt fingering, seating and tasks for your needs.
C4 means middle C in this book. A higher octave number means a higher note. Some electronic instruments use different octave labels.
Your lesson route
Each lesson has a teaching page and a practice page. Tick it when you can show its skill.
○ 01 Meet the piano and keyboard · 9
○ 02 Set up your playing space · 11
○ 03 Sit comfortably · 13
○ 04 Shape your hands · 15
○ 05 Know your finger numbers · 17
○ 06 Find two and three black keys · 19
○ 07 Find every C · 21
○ 08 Name the white keys · 23
○ 09 Find middle C · 25
○ 10 Hear low and high · 27
○ 11 Keep four steady beats · 29
○ 12 Play and rest · 31
○ 13 Place the right hand · 33
○ 14 Play a right hand ladder · 35
○ 15 Place the left hand · 37
○ 16 Play a left hand ladder · 39
○ 17 Make a connected line · 41
○ 18 Make short sounds · 43
○ 19 Hold for two beats · 45
○ 20 Fit two sounds into a beat · 47
○ 21 Read a note route · 49
○ 22 Hear steps and skips · 51
Reference and writing pages begin on page 97.
Your next lessons
Each lesson has a teaching page and a practice page. Tick it when you can show its skill.
○ 23 Play Window Light · 53
○ 24 Play Quiet Footsteps · 55
○ 25 Take turns between hands · 57
○ 26 Start both hands together · 59
○ 27 Hold a bass note · 61
○ 28 Build C major · 63
○ 29 Build A minor · 65
○ 30 Build F major · 67
○ 31 Build G major · 69
○ 32 Change between two chords · 71
○ 33 Read a chord route · 73
○ 34 Play Friendship Bells · 75
○ 35 Explore loud and soft · 77
○ 36 Shape a musical phrase · 79
○ 37 Find sharps and flats · 81
○ 38 Climb a C major scale · 83
○ 39 Make a tune of your own · 85
○ 40 Play with a partner · 87
○ 41 Use a short practice plan · 89
○ 42 Care for your instrument · 91
○ 43 Prepare a school performance · 93
○ 44 Show your progress · 95
Reference and writing pages begin on page 97.
See the playing position
Side view: feet supported, elbows near the keys and shoulders relaxed. Adjust bench height and distance with an adult.
Hand view: fingers gently curved and wrists flexible. Ask a teacher to check your own position.
Your fingers and key names
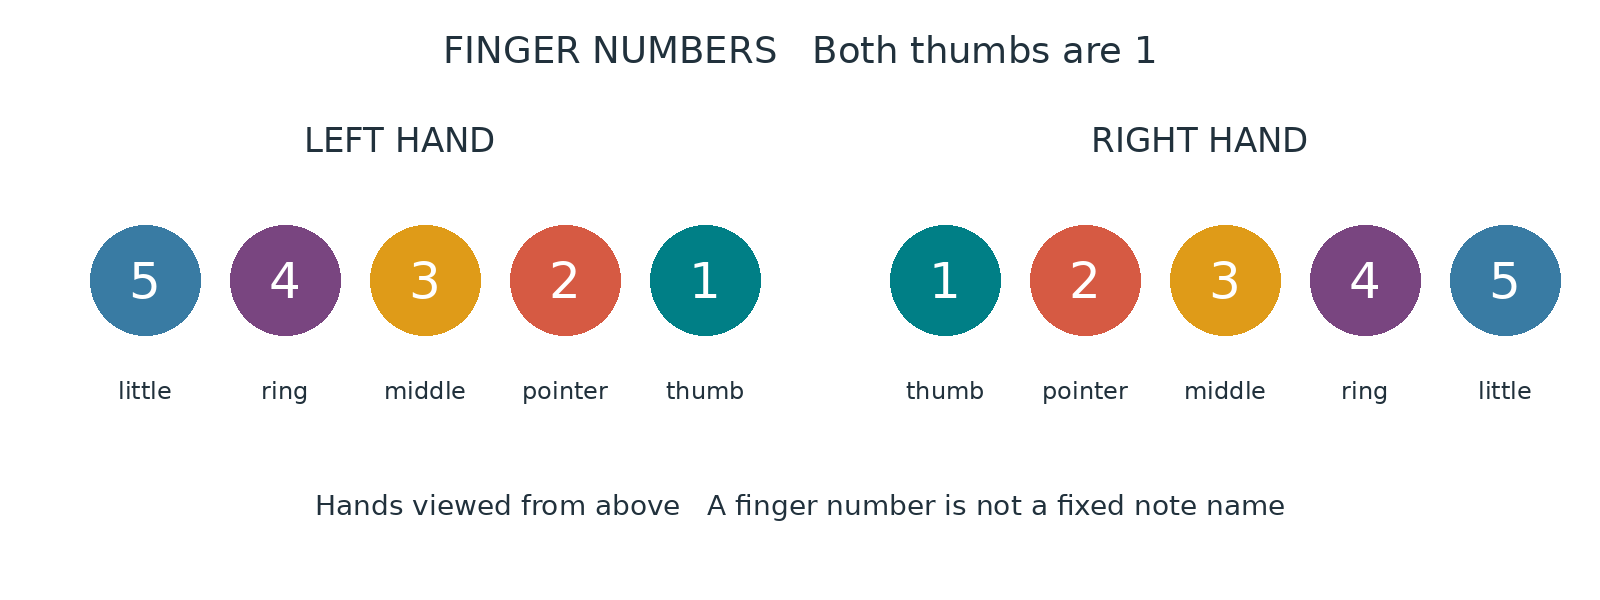
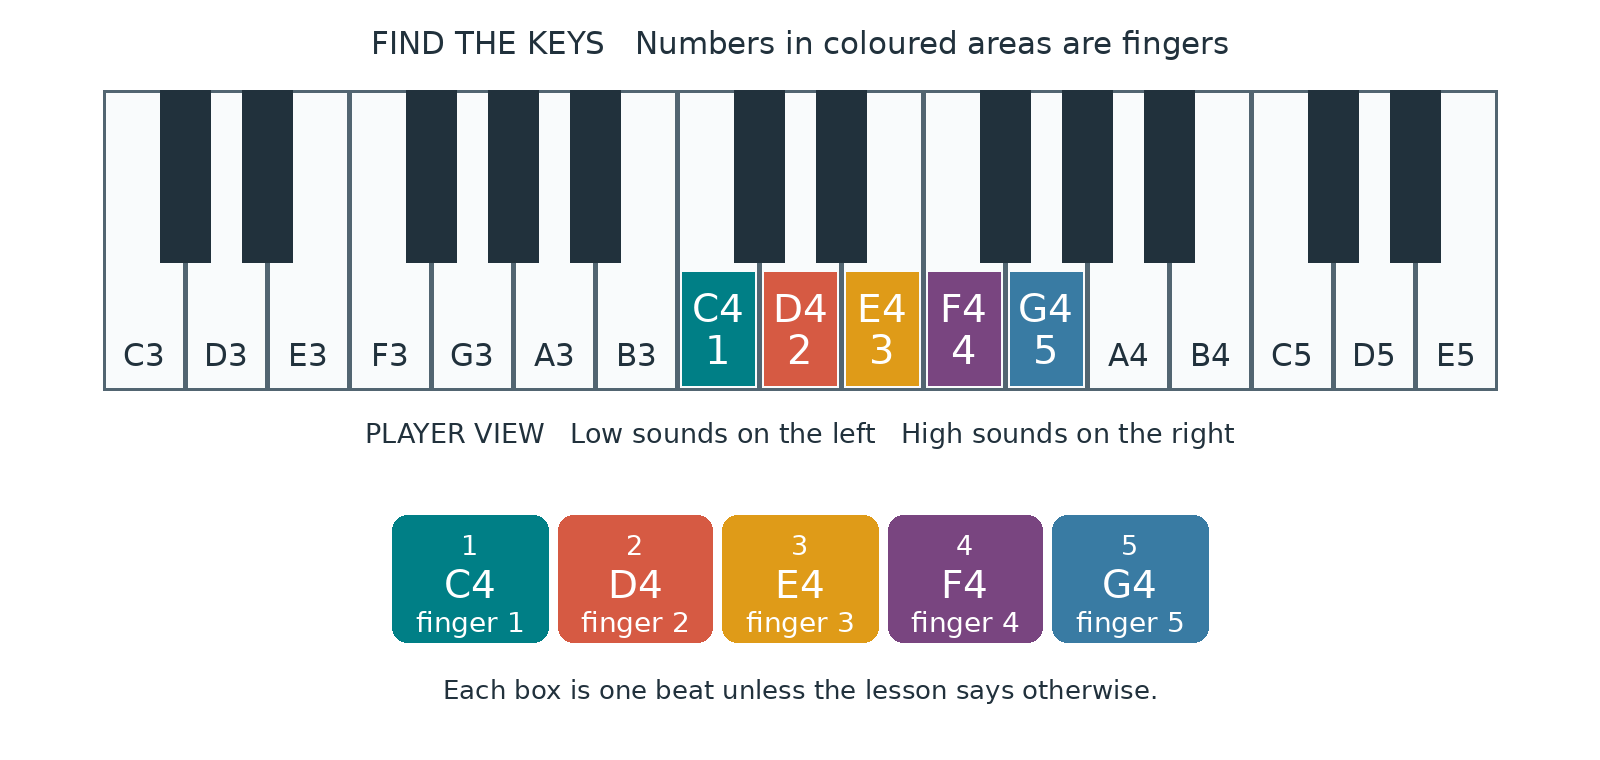
Right hand example: thumb on C4. Left hand fingers run the other way: 5 4 3 2 1 from C3 to G3.
Read the visual maps
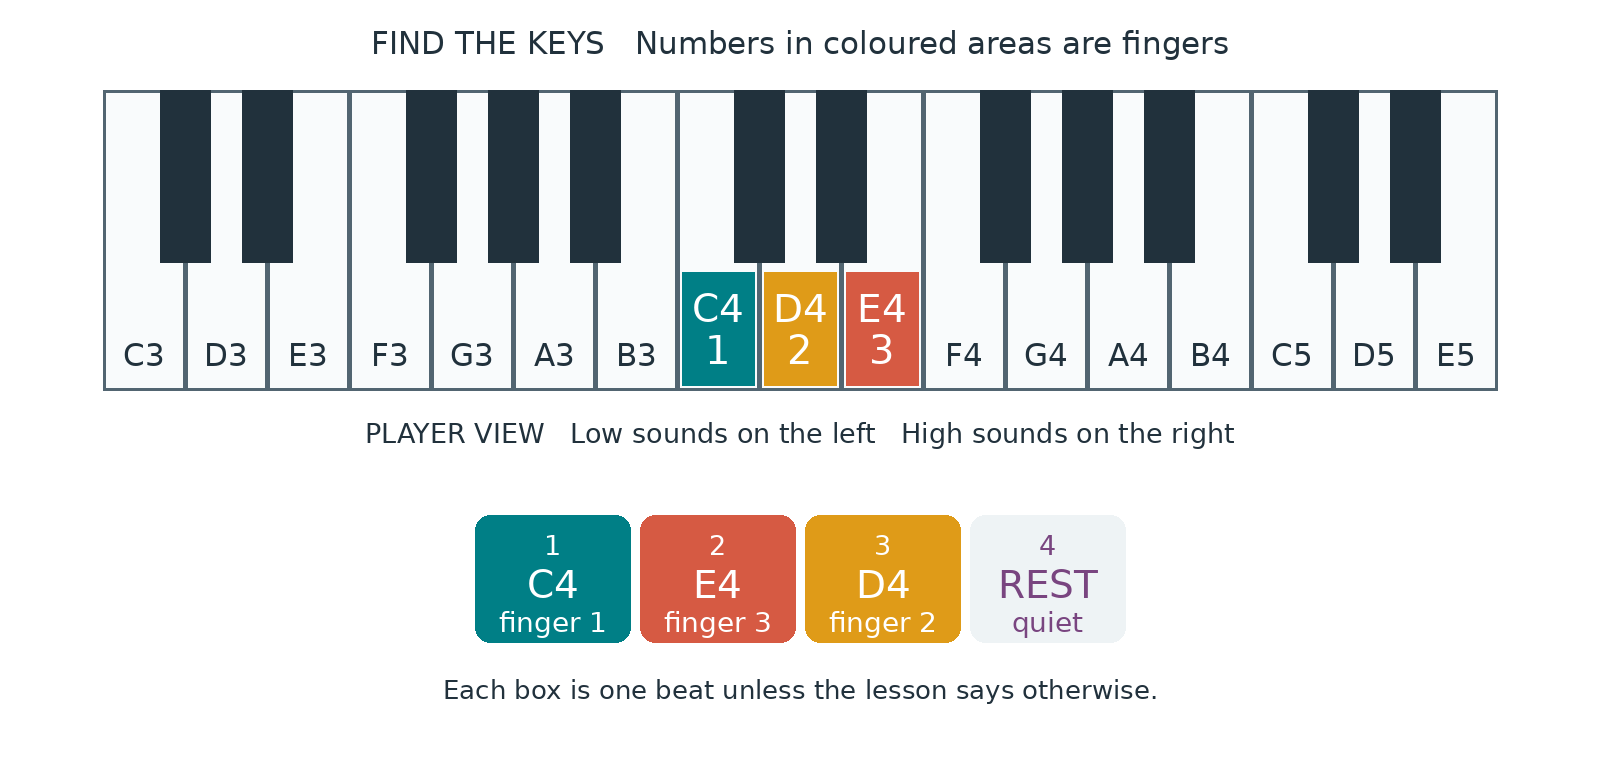
1. The upper picture shows keys from the player view.
2. Colored keys show where to play
3. numbers are fingers.
4. Lower boxes read from left to right. REST means silence.
For a chord, play the marked notes together. For a melody, play the route in order. Timing comes from the instructions. Octave labels distinguish lower and higher notes.
LESSON 01 • LOOK AND TRY
Meet the piano and keyboard
Find the parts that help you play.
1. Point to the keys, music rest and bench.
2. On a digital keyboard, ask an adult to show power and volume.
3. Acoustic pianos use hammers and strings
4. digital instruments use electronic sound.
Listen: Press a key gently and hear its sound.
Check: Try slowly. Ask your teacher to check the sound and your comfort.
LESSON 01 • PLAY AND CHECK
Try it yourself
1. Name three parts without looking.
2. Find the piano sound on a digital instrument with help.
3. Draw your instrument on paper and label it.
Ready for more? Compare an acoustic piano with a digital keyboard.
School connection: Naming and describing practices clear language.
○ I tried it ○ I can show it ○ I want help
One thing I noticed: __________________________
My next small step: ___________________________
LESSON 02 • LOOK AND TRY
Set up your playing space
Make a stable space with a comfortable sound level.
1. Ask an adult to secure the keyboard stand and bench.
2. Keep drinks away and cables out of your walking path.
3. Start at a comfortable volume with the piano sound selected.
Listen: You should hear clearly without needing a loud volume.
Check: Try slowly. Ask your teacher to check the sound and your comfort.
End of your free sample
You have read the free sample of Piano and Keyboard for Students (11 of 104 pages).
Buy the complete book as a PDF download for $7.99 (USD). Secure checkout with Stripe; your download opens right after payment and a receipt is emailed to you.