Free sample · first 11 of 104 pages
Cello for Students
Look Listen Play
By Olushola Adebowale • NISMCAA • Book 13
Your cello journey
Learn to sit comfortably, make plucked and bowed sounds and find selected first-position notes. Then use them in rhythms, short tunes and music with others. Learn at your own pace with a cello teacher.
Begin with open C2, G2, D3 and A3. Later use notes on D and A and a one-octave D major scale. D3 is open D; D4 is one octave above it.
My name: _________________________________
My school: _________________________________
My teacher: _________________________________
My first goal: _________________________________
How to use your book
1. LOOK at the picture and find the same part on your cello.
2. LISTEN to your teacher model a short sound or phrase.
3. TRY one small action. Rest, get feedback and try again.
4. PRACTICE the facing page and show what you learned.
Pictures guide you. A teacher checks instrument fit, bow hold and exact finger places. Stop if playing hurts. Ask for an adapted task or setup when needed.
Your lesson route
Each lesson has a teaching page and a practice page. Repeat it until you can show the skill comfortably.
○ 01 Meet your cello · 9
○ 02 Make a comfortable seat · 11
○ 03 Balance the instrument · 13
○ 04 Look from another angle · 15
○ 05 Meet the four strings · 17
○ 06 Your first gentle pluck · 19
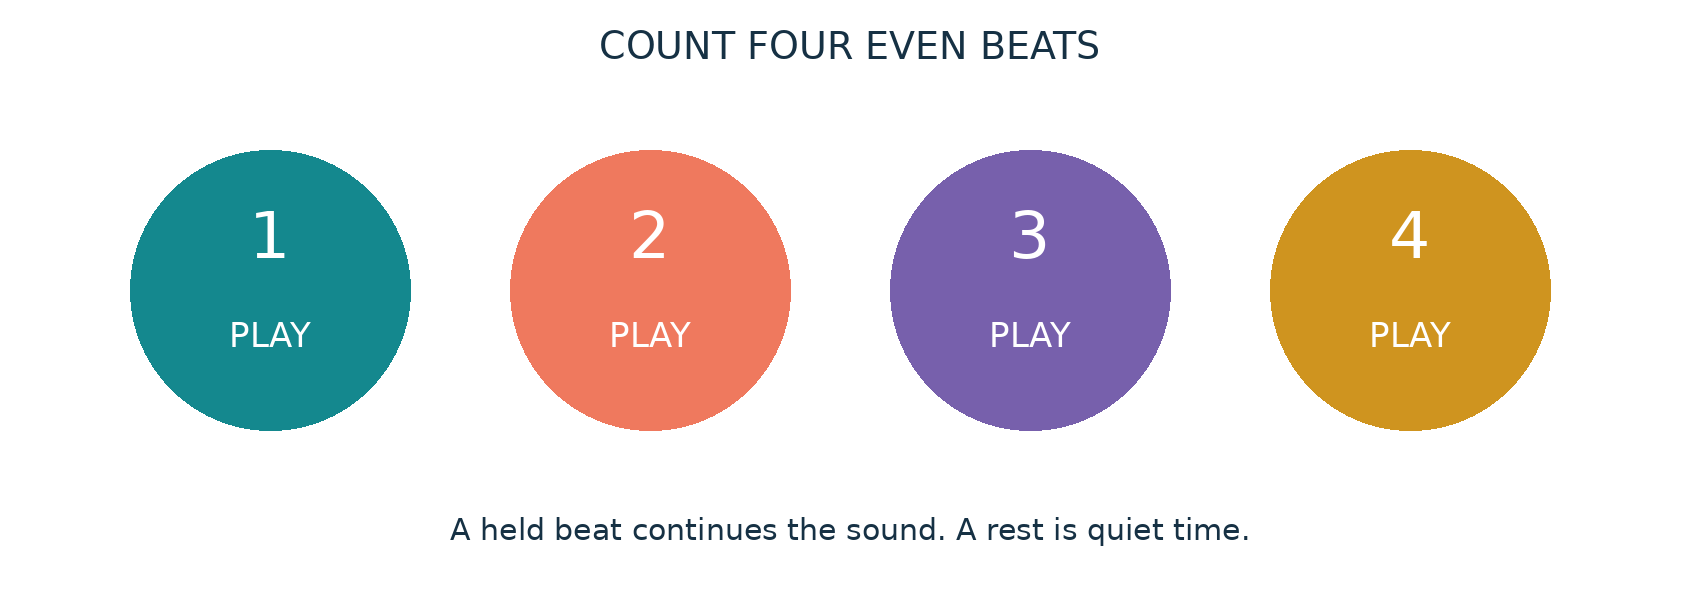
○ 07 Keep four even beats · 21
○ 08 Make room for silence · 23
○ 09 Change from D to A · 25
○ 10 Listen to G and C · 27
○ 11 Play a plucked phrase · 29
○ 12 Name the bow parts · 31
○ 13 Balance your bow hand · 33
○ 14 Find where the bow plays · 35
○ 15 Your first bowed sound · 37
○ 16 Two directions for the bow · 39
○ 17 Four separate bow strokes · 41
○ 18 Hold one sound for two beats · 43
○ 19 Cross strings with the bow · 45
○ 20 Listen and change one thing · 47
○ 21 Number your left fingers · 49
○ 22 Prepare first position · 51
References, writing and progress pages begin on page 97.
Your next lessons
Each lesson has a teaching page and a practice page. Repeat it until you can show the skill comfortably.
○ 23 Play E on the D string · 53
○ 24 Play F sharp on D · 55
○ 25 Play G on D · 57
○ 26 Play a D string melody · 59
○ 27 Meet notes on A · 61
○ 28 Play B on A · 63
○ 29 Play C sharp and D on A · 65
○ 30 Join D and A routes · 67
○ 31 Your one octave D major scale · 69
○ 32 Meet F natural on D · 71
○ 33 Meet C natural on A · 73
○ 34 Find notes on the bass staff · 75
○ 35 Read shorter and longer notes · 77
○ 36 Read a short original tune · 79
○ 37 Join two notes in one bow · 81
○ 38 Shape a quiet and fuller phrase · 83
○ 39 Answer another musician · 85
○ 40 Create your own four note idea · 87
○ 41 Rehearse with a group · 89
○ 42 Make a useful practice plan · 91
○ 43 Share your first performance · 93
○ 44 Care for your cello and next steps · 95
References, writing and progress pages begin on page 97.
Your cello from different angles
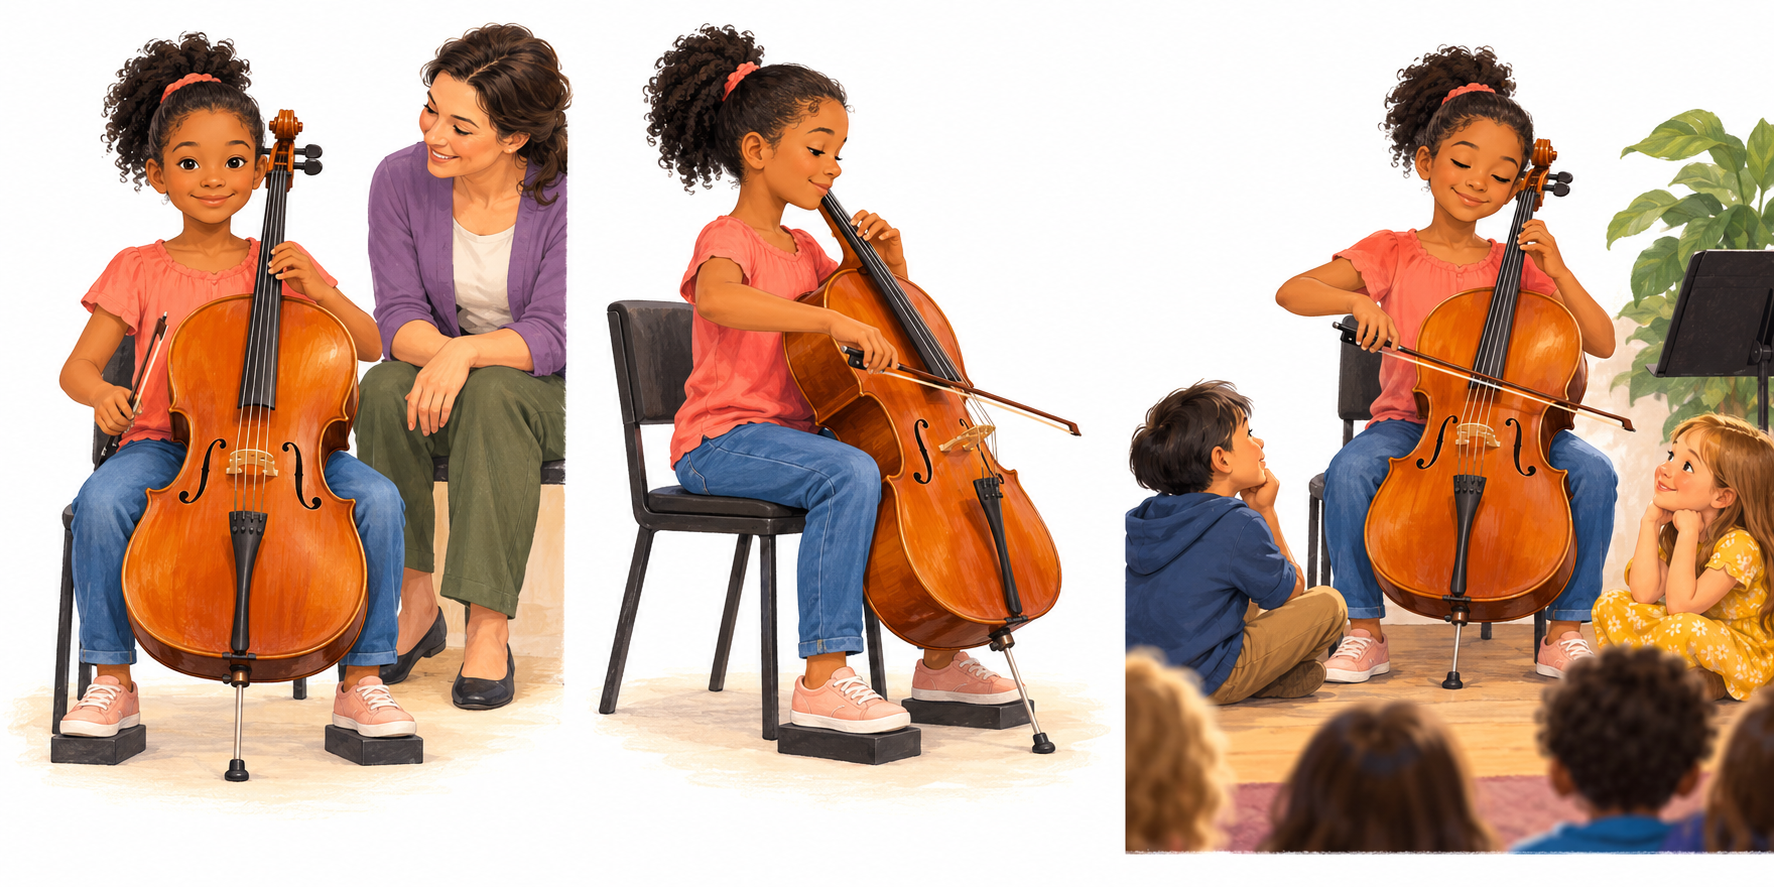
Front view: find supported feet, gentle knee contact and the endpin. Side view: notice the cello leaning toward the player and space for the arms.
The performance picture shows sharing music with friends. The illustrations show general situations; your teacher fits the instrument to your body.
Look at your actual cello with your teacher. Tell them which part of the setup feels comfortable and which part needs help.
My useful adjustment: __________________________
Understand your note maps
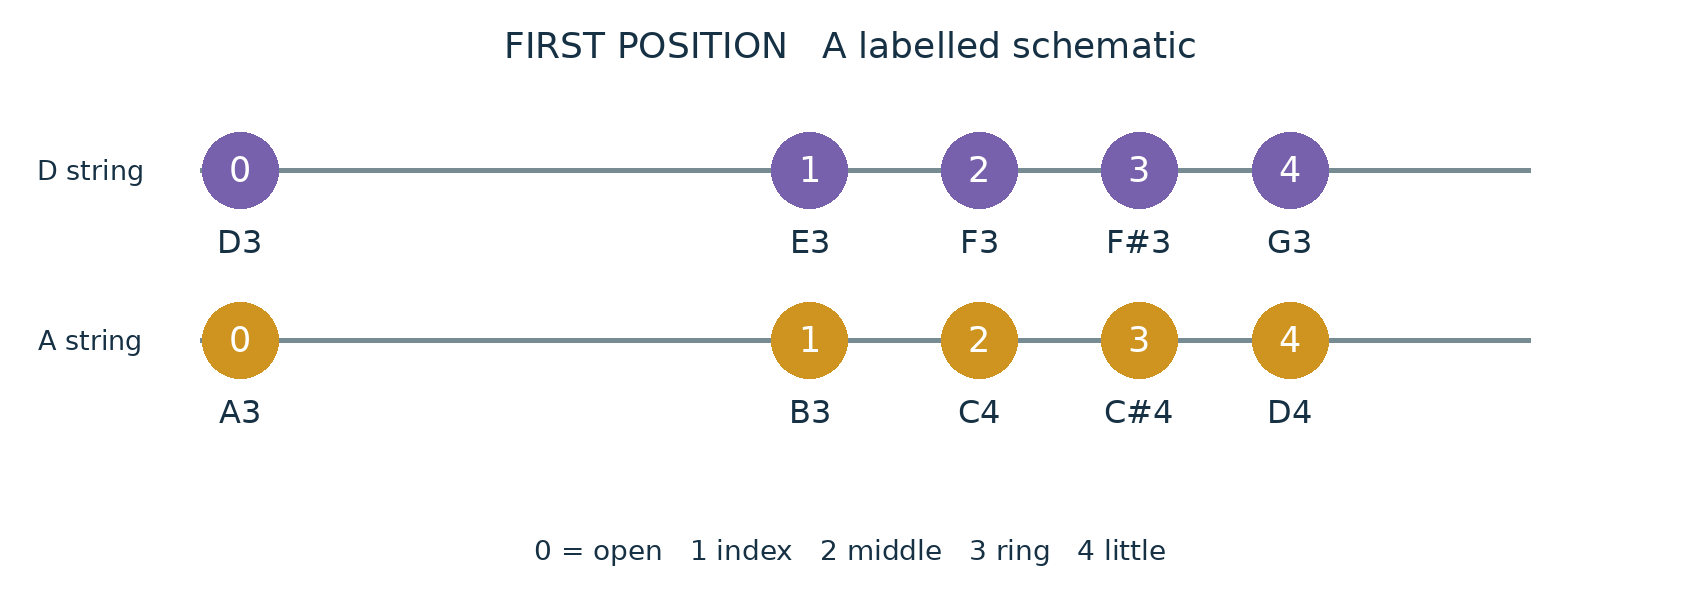
These are labeled schematics, not life-size fingerboard pictures. They arrange the D and A strings in rows so you can compare the notes. They do not show the strings from a front-view camera.
0 means open. Finger 1 is index, 2 middle, 3 ring and 4 little. The thumb rests behind the neck in these tasks. Circles are labels, not frets or places to copy onto your cello.
A teacher finds the exact places with you by listening. Octave numbers distinguish pitches: D3 and D4 are different notes with the same letter.
A teacher helps you start
Your teacher checks cello size, seat, endpin stop, bow preparation and tuning. Do not adjust pegs, move the bridge or overtighten the bow alone.
Keep space around the bow. Rest between attempts, release tight muscles and ask for help if playing is uncomfortable.
This book begins your journey. Advanced playing, shifting and vibrato need further instruction.
LESSON 01 • LOOK AND TRY
Meet your cello
Name the parts you will use.
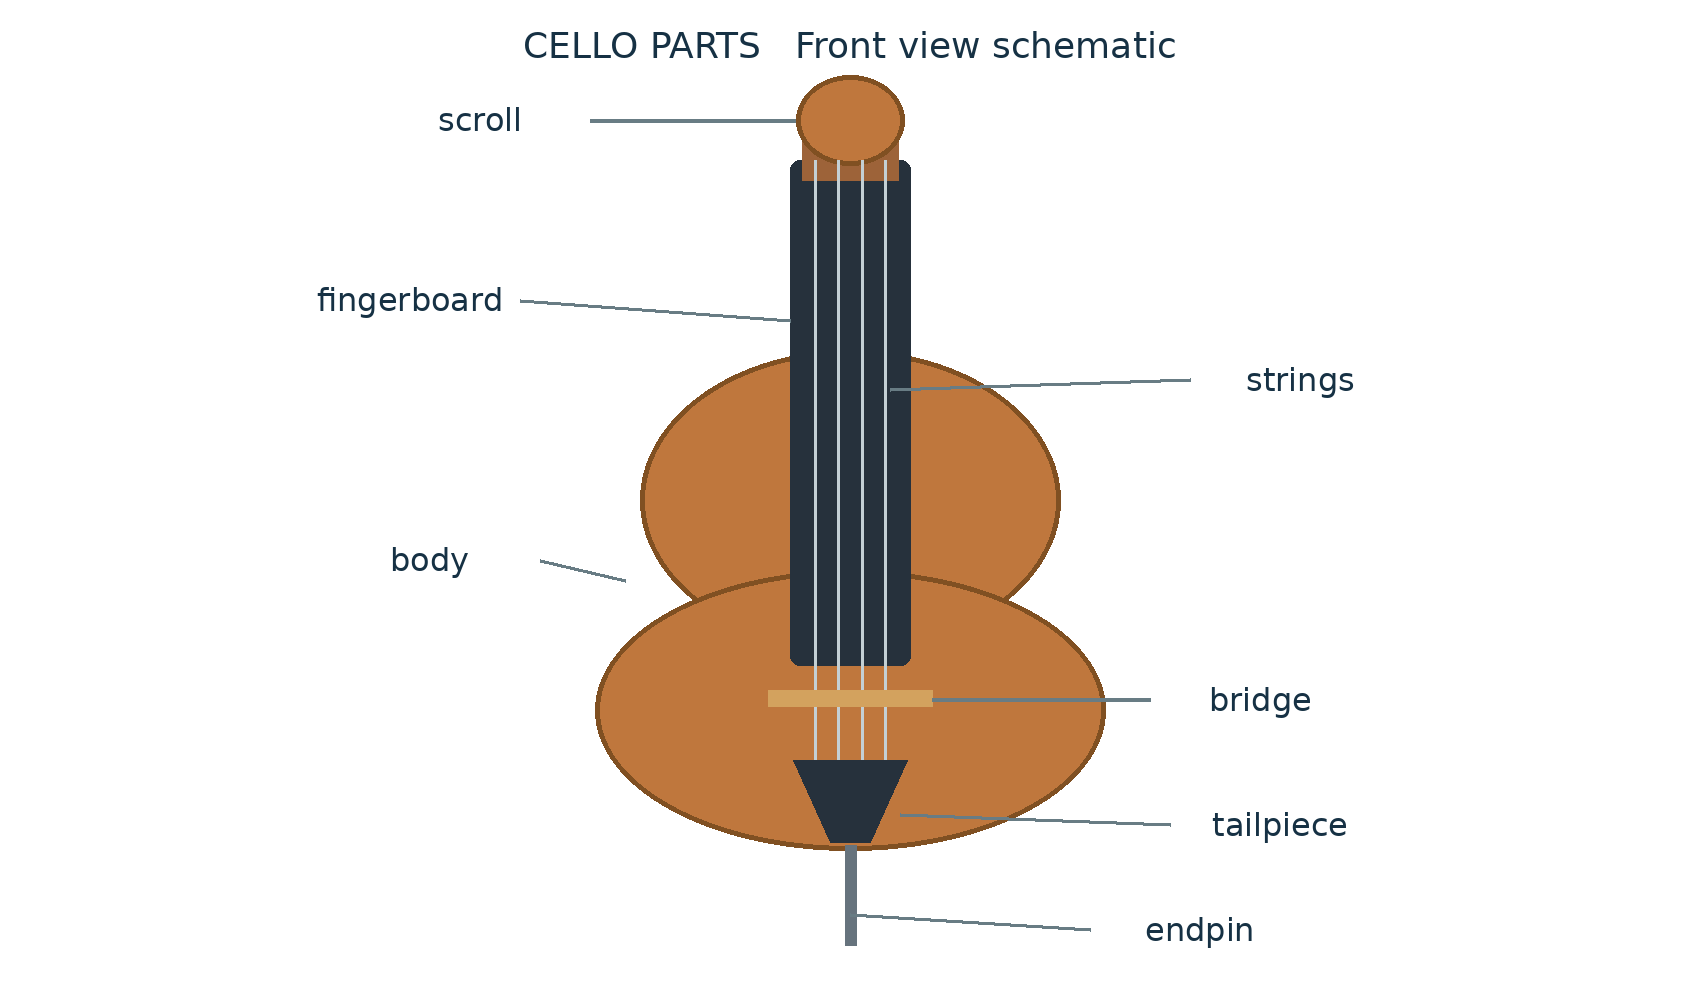
1. Point to the body, neck and strings in the parts picture. Find them on your cello.
2. Find the bridge without touching or moving it. It lifts the strings above the body.
3. Find the endpin with an adult. This support reaches the floor.
Listen and check: Can you describe the cello before playing it?
LESSON 01 • PLAY AND CHECK
Try it yourself
1. Ask someone to name a part. Point to it gently.
2. Say which part makes a sound and which part supports the cello.
3. Draw your favorite part and write its name.
Ready for more? Explain the job of the fingerboard.
School connection: Describe what you hear using clear words.
○ I tried it ○ I can show it ○ I want help
What I noticed: ______________________________
My next step: _________________________________
LESSON 02 • LOOK AND TRY
Make a comfortable seat
Sit with supported feet and easy shoulders.
1. Ask your teacher to choose a stable seat that fits you.
2. Sit with feet supported. Let your arms hang freely before lifting them.
3. Breathe normally. Avoid leaning against a high chair back while playing.
Listen and check: Comfort is the first goal, not a perfect statue pose.
End of your free sample
You have read the free sample of Cello for Students (11 of 104 pages).
Buy the complete book as a PDF download for $7.99 (USD). Secure checkout with Stripe; your download opens right after payment and a receipt is emailed to you.